Previouse article

How to Make RnB Music in 2026: The Complete Producer’s Guide
March 09, 2026
RnB production in 2026 pulls from ambient, hyperpop, alt-pop, and…
Read more


As a music production and sound design expert, I’ve worked on countless projects and have come to understand the importance of frequency ranges and EQ in audio mixing and music production. In this post, I’m going to guide you through understanding frequency ranges and EQ charts, so whether you’re a beginner or a professional, you’ll be able to apply this knowledge to your next project. Also I would provide my personal top-10 of free EQ plugins that WORK!
For those who may be unfamiliar with the terms, frequency ranges refer to the different sections of sound that we hear in music. These ranges include low frequencies (20 Hz – 250 Hz), mid frequencies (250 Hz – 4000 Hz), and high frequencies (4000 Hz – 20,000 Hz). Understanding frequency ranges is essential because it allows you to identify and adjust the different sections of sound in a track. This is where EQ comes in.
EQ, or equalization, is a tool that allows you to adjust the balance of frequencies in a track. With EQ, you can boost or cut specific frequencies to create a more balanced and polished sound. EQ is a powerful tool, but it can be overwhelming for beginners. However, with some knowledge and practice, you can master EQ and take your tracks to the next level.
In this post, I’ll provide a comprehensive guide to frequency ranges and EQ, including how to read and interpret an EQ frequency chart. I’ll also provide tips on how to effectively use EQ in a mix, such as removing unwanted frequencies, enhancing specific instruments, and creating space in a mix. By the end of this post, you’ll have a solid understanding of frequency ranges and EQ, and be able to apply this knowledge to your own music production.
This article is provided by Monosounds.studio – an ultimate platform that offers high-quality sample packs, Serum presets, and music production tools.
So, whether you’re looking to learn more about music production or improve your skills, monosounds.studio has got you covered. – click here to check it out
So, let’s dive in and explore the world of frequency ranges and EQ. Whether you’re working in FL Studio or Ableton Live, this post will provide you with the knowledge and tools you need to create polished and professional tracks.
Before we dive into the intricacies of EQ and frequency ranges, it’s essential to understand what frequency ranges are and how they are measured. Frequency refers to the number of cycles per second of a sound wave and is measured in Hertz (Hz). In music production, we use frequency ranges to describe the different sections of sound that we hear in a track.
The three primary frequency ranges in music production are low frequencies, mid frequencies, and high frequencies. Low frequencies range from 20 Hz to 250 Hz, mid frequencies range from 250 Hz to 4,000 Hz, and high frequencies range from 4,000 Hz to 20,000 Hz. Each of these frequency ranges plays a crucial role in the overall sound of a track.
Low frequencies are responsible for the deep and powerful bass sounds in a track. The bass and kick drum usually occupy this frequency range, and it’s important to give them enough space in the mix to ensure they don’t overpower the other elements of the track. However, too much low-frequency energy can make a mix sound muddy and indistinct, so it’s crucial to balance the bass frequencies.
Mid frequencies are responsible for the body and presence of a track. This frequency range includes the vocals, guitars, and many other instruments. By adjusting the mid frequencies, you can bring out the character of the instruments and create a more balanced mix.
High frequencies are responsible for the clarity and sparkle in a track. This frequency range includes cymbals, hi-hats, and other high-pitched instruments. By adjusting the high frequencies, you can add brightness and presence to a mix and create a sense of air and space.
Identifying frequency ranges in a track can be a challenge, especially for beginners. One way to train your ear to identify frequency ranges is by using EQ. By boosting or cutting specific frequencies, you can hear how they affect the overall sound of a track. This will help you develop a better sense of where different instruments sit in the frequency spectrum and how to adjust them to create a more balanced mix.
In summary, understanding frequency ranges is crucial to creating a balanced and polished mix. By identifying the different frequency ranges in a track, you can use EQ to adjust them and create a more professional sound. Remember, when working with frequency ranges, it’s all about balance. Each frequency range plays an essential role in the overall sound of a track, and it’s up to you to find the right balance between them.
Now that we’ve covered the basics of frequency ranges, it’s time to dive into equalization, or EQ. EQ is a tool that allows you to adjust the balance of frequencies in a track. With EQ, you can boost or cut specific frequencies to create a more balanced and polished sound. EQ is a crucial tool in audio mixing and music production, but it can be overwhelming for beginners. In this section, we’ll explore what EQ is and how it works.
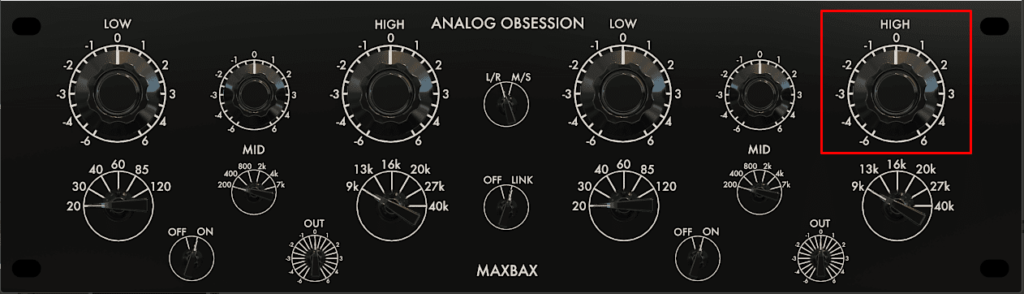
EQ works by dividing the frequency spectrum into different bands, each with a set range of frequencies. The most common types of EQ are parametric EQ, graphic EQ, and shelving EQ.
Parametric EQ allows you to adjust the frequency, bandwidth, and gain of each band, giving you more control over the sound. Graphic EQ, on the other hand, uses a fixed set of bands with preset frequencies and gains. Graphic EQ is useful for broad adjustments but lacks the precision of parametric EQ. Finally, shelving EQ adjusts all frequencies above or below a set frequency, allowing you to boost or cut high or low frequencies.
When using EQ, it’s important to be careful not to overdo it. Boosting or cutting too much of a particular frequency can result in an unbalanced or unnatural sound. Instead, aim to make subtle adjustments to achieve a more natural and polished sound.
There are many ways to use EQ in a mix, but some common techniques include removing unwanted frequencies, enhancing specific instruments, and creating space in a mix. Removing unwanted frequencies involves identifying frequencies that are causing problems in the mix and cutting them with EQ. For example, if there is a lot of low-frequency rumble in a track, you can use EQ to cut those frequencies and create a cleaner sound.
Enhancing specific instruments involves boosting the frequencies that make an instrument stand out in the mix. For example, if you want to bring out the presence of a guitar, you can boost the mid frequencies where the guitar sits.
Creating space in a mix involves using EQ to separate different instruments and create a sense of depth and space. For example, you can use EQ to cut the low frequencies of a guitar to make room for the bass and kick drum.
In conclusion, EQ is a powerful tool that allows you to adjust the balance of frequencies in a track. There are many different types of EQ, each with its own advantages and disadvantages. When using EQ, it’s essential to be careful not to overdo it and to aim for subtle adjustments to achieve a natural and polished sound. If you’re looking to improve your EQ skills, be sure to check out monosounds.studio for more resources and courses.
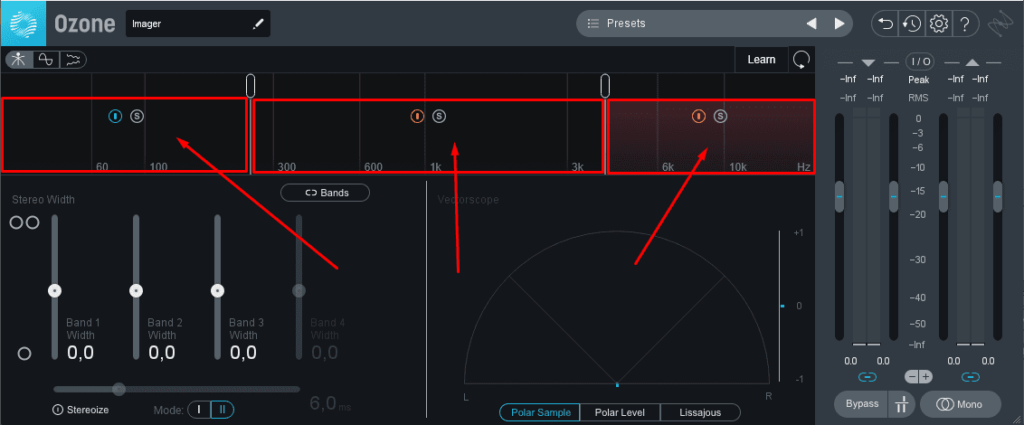
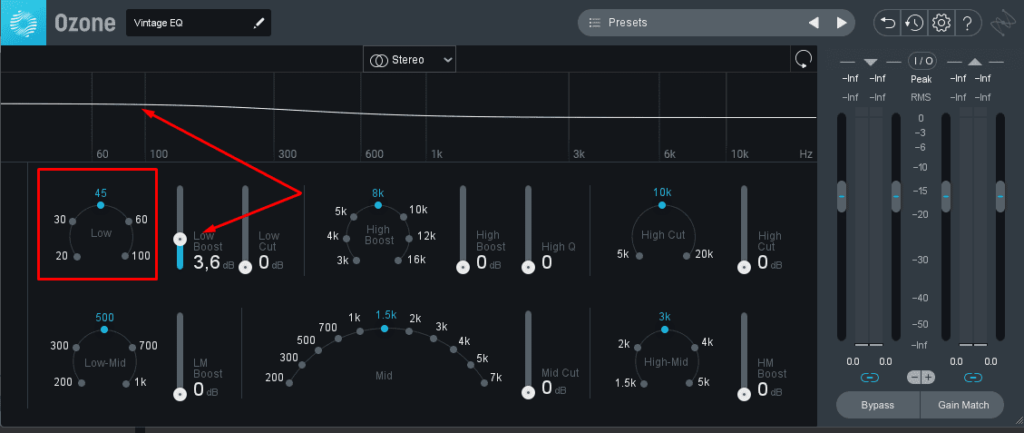
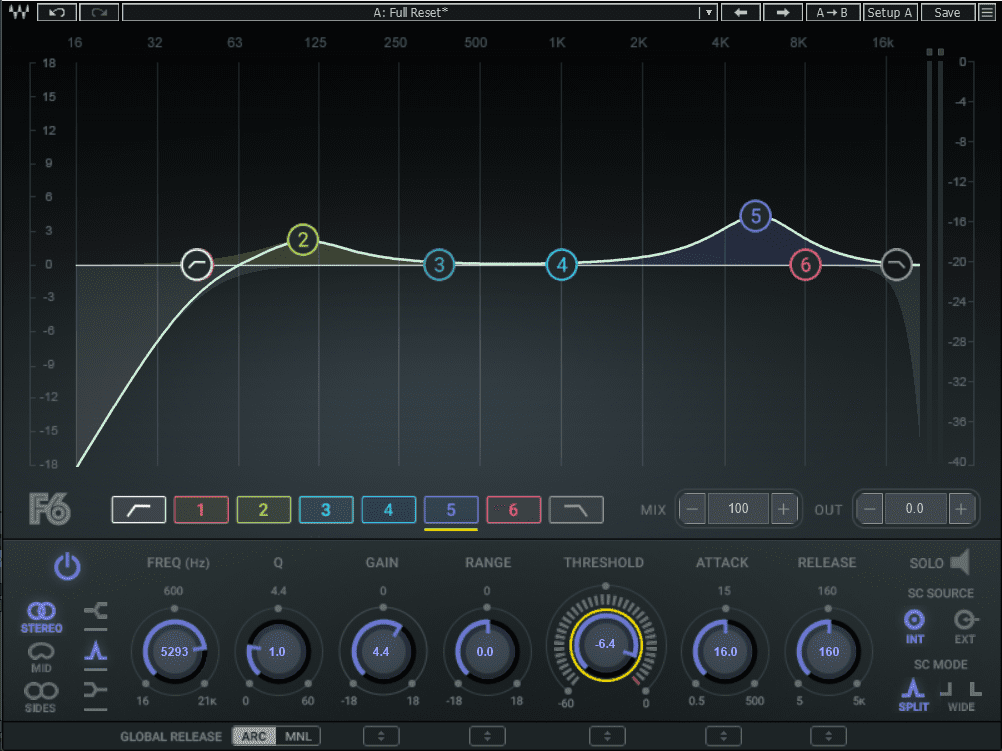
Now that we’ve covered the basics of EQ, let’s explore the EQ frequency chart. The EQ frequency chart is an essential tool in audio mixing and music production as it provides a visual representation of the different frequency ranges and their corresponding instruments or sounds.
The EQ frequency chart is typically divided into low, mid, and high frequencies, with each section further divided into different frequency ranges. The chart typically includes specific frequencies, such as 20 Hz, 200 Hz, 2 kHz, and 10 kHz, along with their corresponding frequency ranges.
By understanding the EQ frequency chart, you can identify which frequency range an instrument or sound occupies and use EQ to adjust it accordingly. For example, if you have a bass guitar that is overpowering the mix, you can use the EQ frequency chart to identify the frequency range of the bass guitar and cut those frequencies to create more space in the mix.
In addition to using the EQ frequency chart to adjust individual instruments, you can also use it to create a more balanced and polished mix. By balancing the frequencies of different instruments, you can create a mix where each instrument has its own space and is not overpowering any other instrument.
One of the benefits of using the EQ frequency chart is that it allows you to make more informed decisions when adjusting the EQ of a track. Instead of guessing which frequencies to adjust, you can use the chart to identify the specific frequencies that need to be boosted or cut.
Another benefit of the EQ frequency chart is that it can help you train your ear to identify different frequency ranges. By listening to different instruments and sounds and comparing them to the chart, you can develop a better sense of where different instruments sit in the frequency spectrum.
In conclusion, the EQ frequency chart is an essential tool in audio mixing and music production. By understanding the chart and using it to make informed decisions when adjusting the EQ of a track, you can create a more balanced and polished sound.
If you want to produce with the best sounding sounds be sure to check out monosounds.studio for more resources. – click here
Now that we’ve explored the basics of EQ and the EQ frequency chart, it’s time to dive into some tips for using EQ effectively in your mixes. While EQ is a powerful tool, it’s also easy to overdo it, which can result in an unnatural or unbalanced sound. By following these tips, you can use EQ to enhance your tracks without overdoing it.
In conclusion, EQ is a powerful tool that can help you achieve a more balanced and polished sound in your mixes. By following these tips and using EQ sparingly and effectively, you can take your tracks to the next level.
In this post, we’ve explored the basics of frequency ranges and EQ and how they are essential to audio mixing and music production. Understanding frequency ranges is crucial to creating a balanced and polished mix, and EQ is a powerful tool that allows you to adjust the balance of frequencies in a track.
We’ve also explored the EQ frequency chart, a visual representation of the different frequency ranges and their corresponding instruments or sounds. By using the EQ frequency chart, you can make more informed decisions when adjusting the EQ of a track and create a more balanced and polished sound.
Finally, we’ve provided some tips for using EQ effectively in your mixes, such as creating space in the mix, using EQ sparingly, and experimenting with different types of EQ. By following these tips and using EQ effectively, you can take your tracks to the next level and create a more professional sound.
Thank you for reading, and I hope you found this post helpful in understanding frequency ranges and EQ. With practice and patience, you can master EQ and create professional-sounding tracks that stand out in the industry.
Remember, if you’re looking for the best sounds & serum presets, be sure to check out monosounds.studio. They offer a wide range of sample packs, presets, and MIDIs that can help you take your tracks to the next level. – click here to visit 😉
RnB production in 2026 pulls from ambient, hyperpop, alt-pop, and…

The sounds you choose define a track before a single…

Best Xfer Serum 2 Presets (Ultimate Producer Guide) Sound design…

Xfer Serum 2 is the industry standard synthesizer for a…